Gimpshop How to Draw a Circle
In any photo editing app, the crop tool is the nigh useful 1 to remove unnecessary portions from an paradigm. All simple and powerful photo-editors provide a basic ingather tool. Nonetheless, when it comes to cropping co-ordinate to shapes, very few of them have anything to offer.
GIMP is the free photo-manipulation tool available for Windows, macOS, and Linux. Though information technology has been around for a while, it lacks the shape crop feature. Nevertheless, that doesn't mean you cannot achieve the same in it. All you need to practise is follow a workaround. Yous tin then ingather images in any shape.
In this tutorial, we volition tell you how to crop a picture into a circular shape in GIMP. Yous can apply the same method for other shapes too, such every bit oval, alphabets, etc. Permit'southward go started.
How to Perform a Circular Crop in GIMP
Hither are the steps:
Step 1: Launch GIMP and open the image in it that y'all want to crop.

Step two: Since GIMP doesn't offer a congenital-in way to crop an image into a circular shape, we will exist taking the aid of the Ellipse selection tool. For that, click on the Ellipse tool in the toolbar, the one that is oval shaped. Alternatively, press the E cardinal on your keyboard to activate that tool.
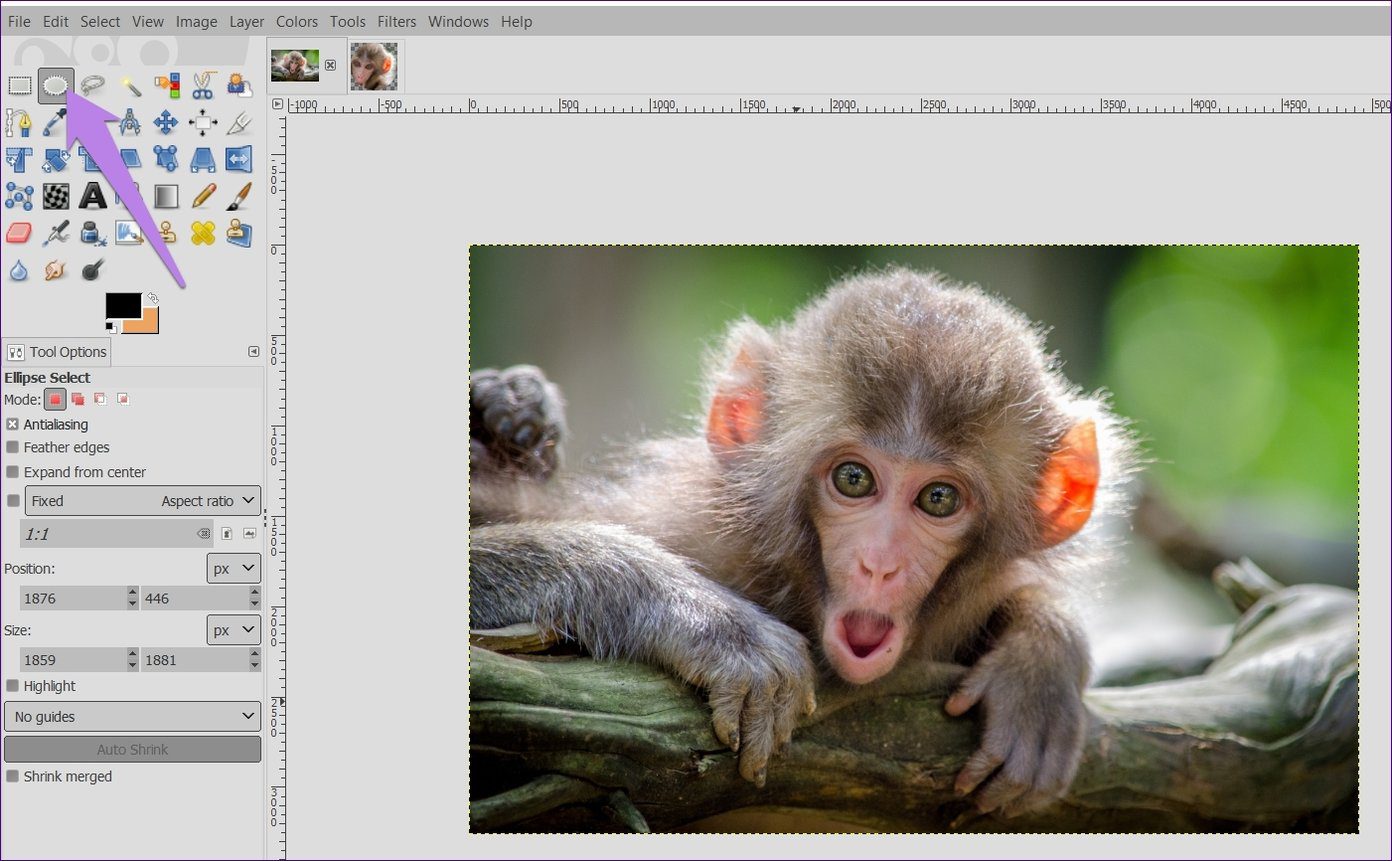
Step 3: Using your mouse describe a circle on the desired area of the image. By default, the circle will not be of the fixed shape. To go on the size fixed, check the Fixed option from the Tool Options present in the left sidebar. Then draw a circle.

Step four: Click and drag the mouse on the selected surface area to change its position. To increase or decrease the pick size, employ the four corners of the selection.
Step 5: Now, in that location are three methods to create a circular prototype. Let's cheque them out individually.
Method 1: Paste on Another Paradigm
If you want to paste the circular image directly on another image without saving it, hither's how to get about it.
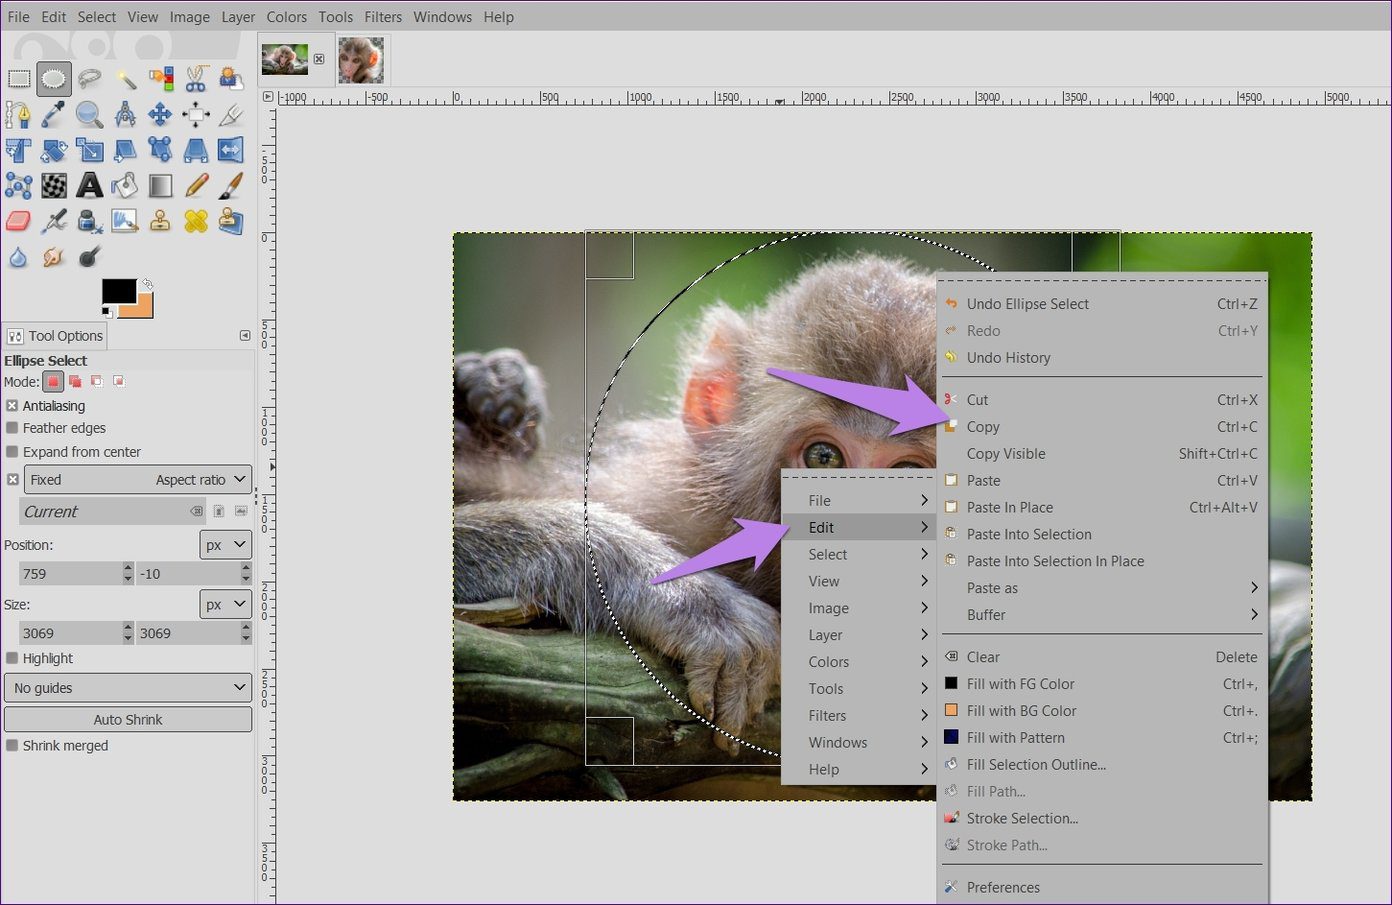
Step 1: Right-click on the selected area of footstep four to a higher place and go to Edit > Copy.
Step 2: Open the second paradigm in GIMP using File > Open.
Stride iii: Right-click on the new image and go to Edit > Paste. Alternatively, use the shortcut Ctrl + V (Windows) and Command + V (Mac).
Use the Scale and Move tools to adjust your pasted epitome.

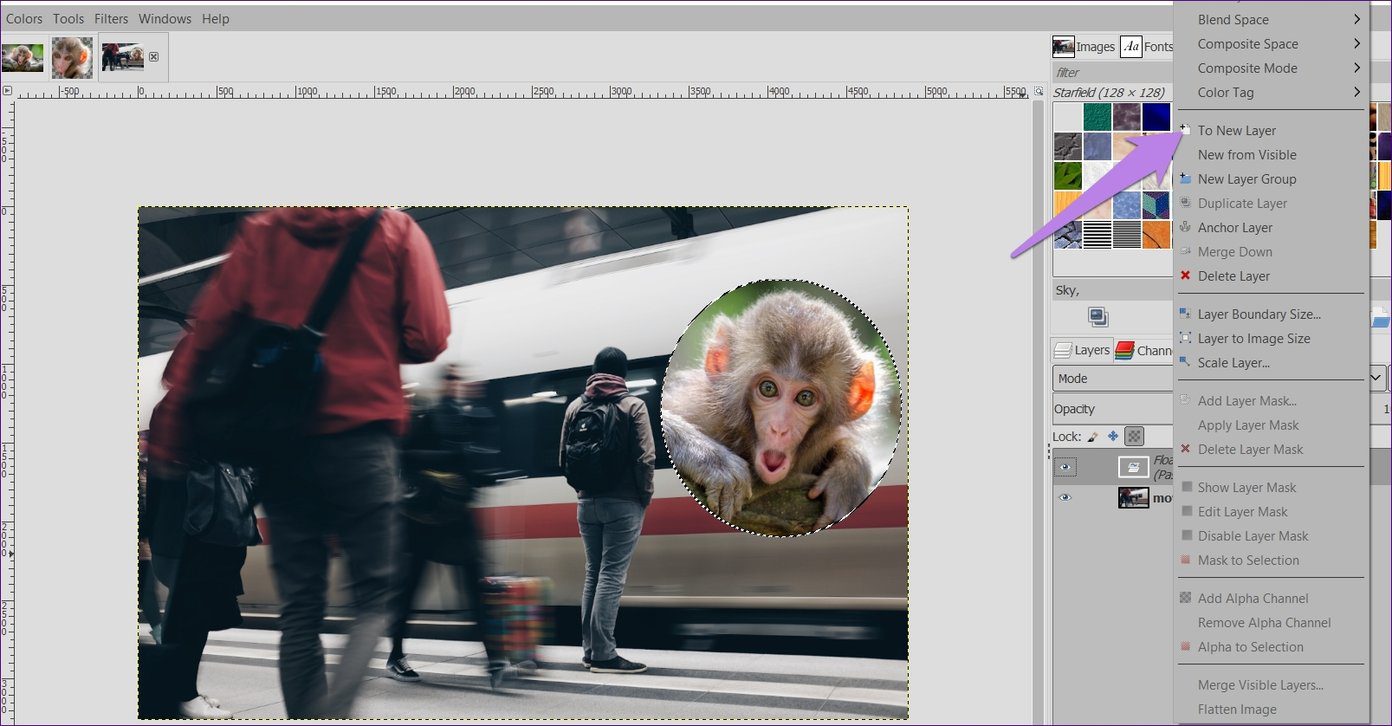
Stride 4: Under Layer in the sidebar, right-click on this Floating selection layer and choose To a new layer.
Step 5: Save the prototype using File > Export equally.
Method 2: Remove Background
Another way to create a circular image is to remove the groundwork. You will too get the epitome with a transparent background using this method.
To exercise so, follow these steps:
Pace 1: Once you have selected your desired circular area using the Ellipse tool, correct-click on the choice and choose Select > Capsize. Alternatively, utilize the shortcut Ctrl + I. You will see that the outer surface area gets selected at present.

Stride 2: To go a transparent background, you demand to add an alpha channel to your image. For that, right-click on your epitome layer under Layers tab in the sidebar and click on Add Blastoff Channel.

Tip:
Pace three: Again, correct-click on the chief image and select Edit > Clear. You can also press the Delete fundamental. Doing that will remove the background leaving yous with the circular image just.

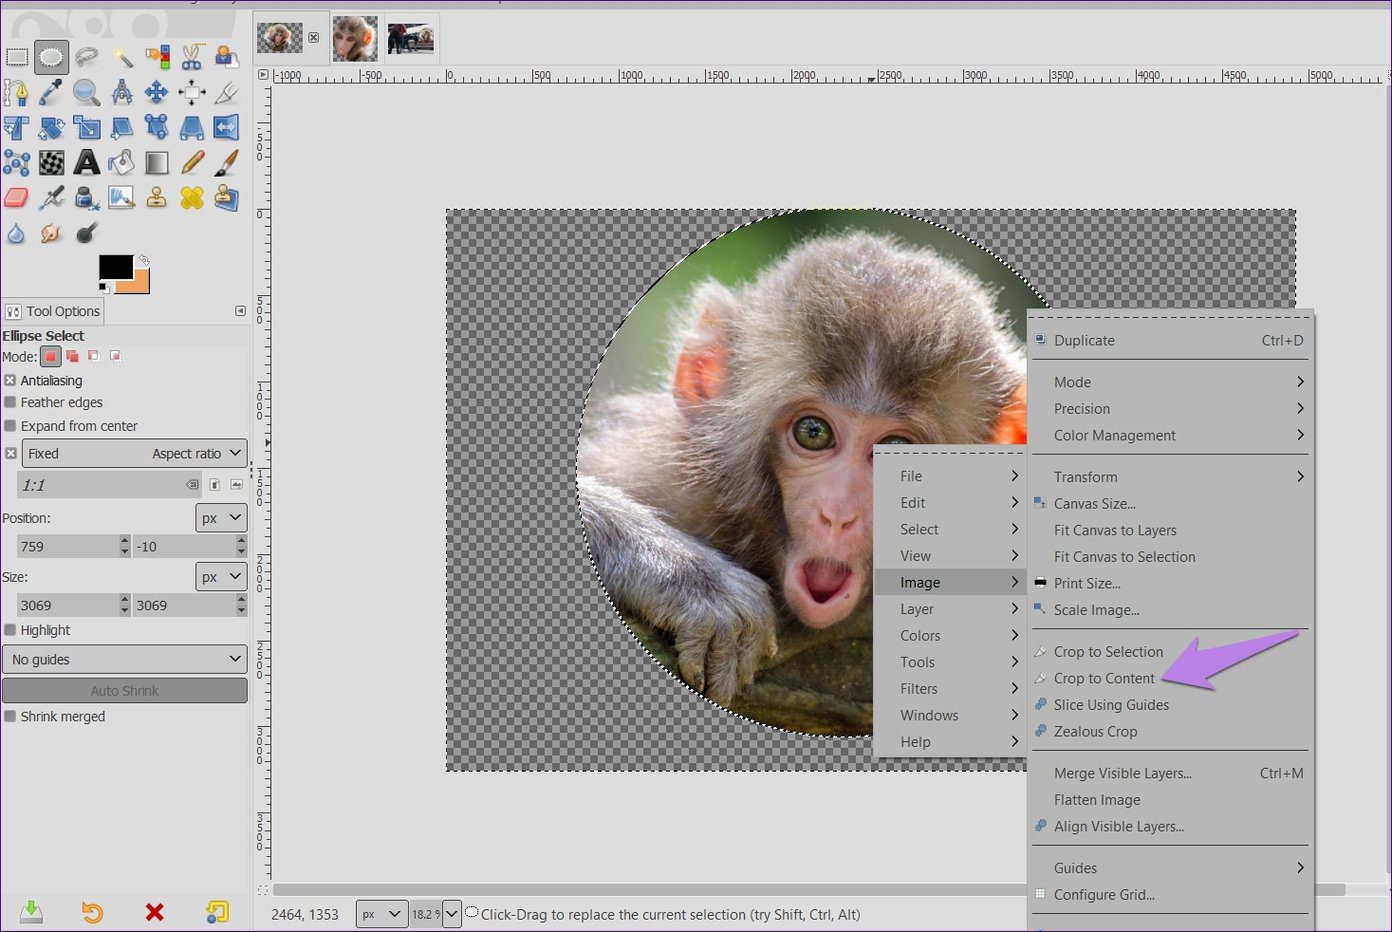
Step 4: If you save the paradigm at this point, it will have an extra background around it. To brand the size of your prototype the same as that of the circle, employ the auto-crop feature. That is, get to Image > Crop to Content. You can also right-click and click on Image > Ingather to Content.

Step v: This step is very crucial. Y'all need to save your image in the PNG format to keep the transparency. Saving it in JPG or other formats will add a background color to your image. When you have an image with a transparent groundwork, yous can apply it on peak of any image. Information technology will wait like equally if information technology is part of the paradigm.
To salvage in PNG format, go to File > Export equally. Keep the extension as .png.

Method 3: Paste equally New Paradigm
If the above method sounds tedious, there's an simple way too for keeping the background transparent of a circular paradigm.
Here are the steps:
Step one: One time yous select your area using the Ellipse tool, right-click on it and get to Edit > Copy.
Step 2: Right-click once again on the aforementioned image and choose Edit > Paste as > New Image. You can also use the shortcut Shift + Ctrl + V (Windows) and Shift + Command + 5 (Mac).

Doing that will open your circular image with a transparent background. Now all y'all need to do is save information technology in the PNG format using Export > Save as.

Go Round
Rounded images accept several benefits. They are usable on social media every bit profile pictures. With a transparent background, you can put them on top of whatsoever prototype giving it a distinctive look. In GIMP, you can delete the round cropped section and supersede information technology with a new image too.
Next upwardly: Layers course an important part of image manipulation in GIMP. Hither's how to use them in GIMP.
Source: https://www.guidingtech.com/crop-image-into-circle-gimp/